QMK VIA Manual
- This text is copied directly from the IDOBAO Google Docs version without any modifications, except to fix broken links. Content herein may be outdated.
If you have a keyboard drived by Atmega32u4 of QMK, you can edit the keyboard by VIA as following procedures
-
Download and install software: :
via-?.?.?-win.exeon website:(Windows choose
exefile, Mac choosedmgfile) -
Download flashing tool:
qmk_toolbox.exeon website: -
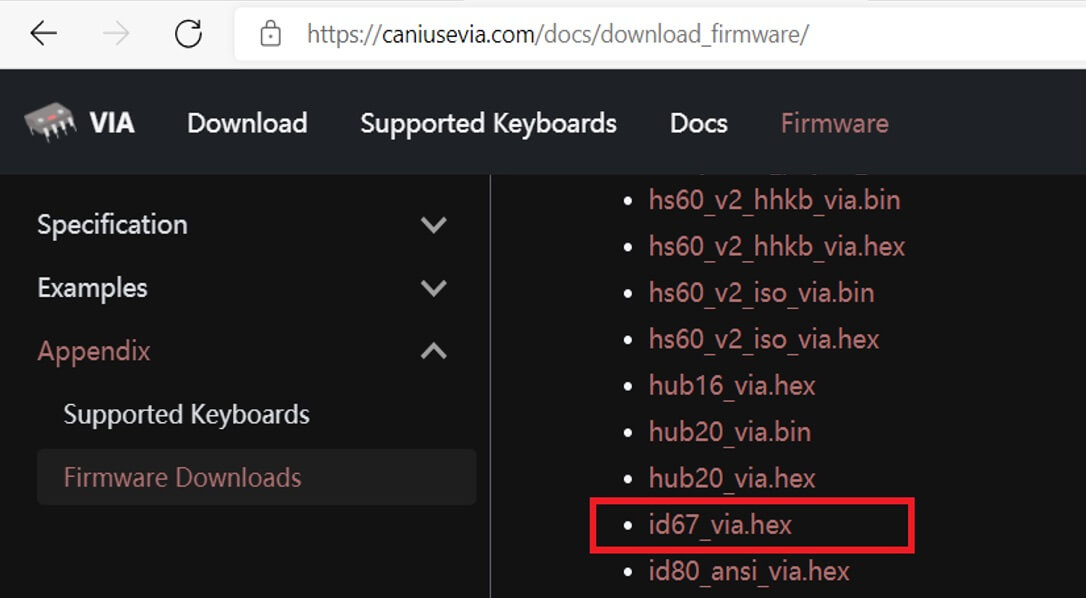
Download VIA hex file (e.g.,
ID67_VIA.hex) on websitehttps://caniusevia.com/docs/download_firmware
-
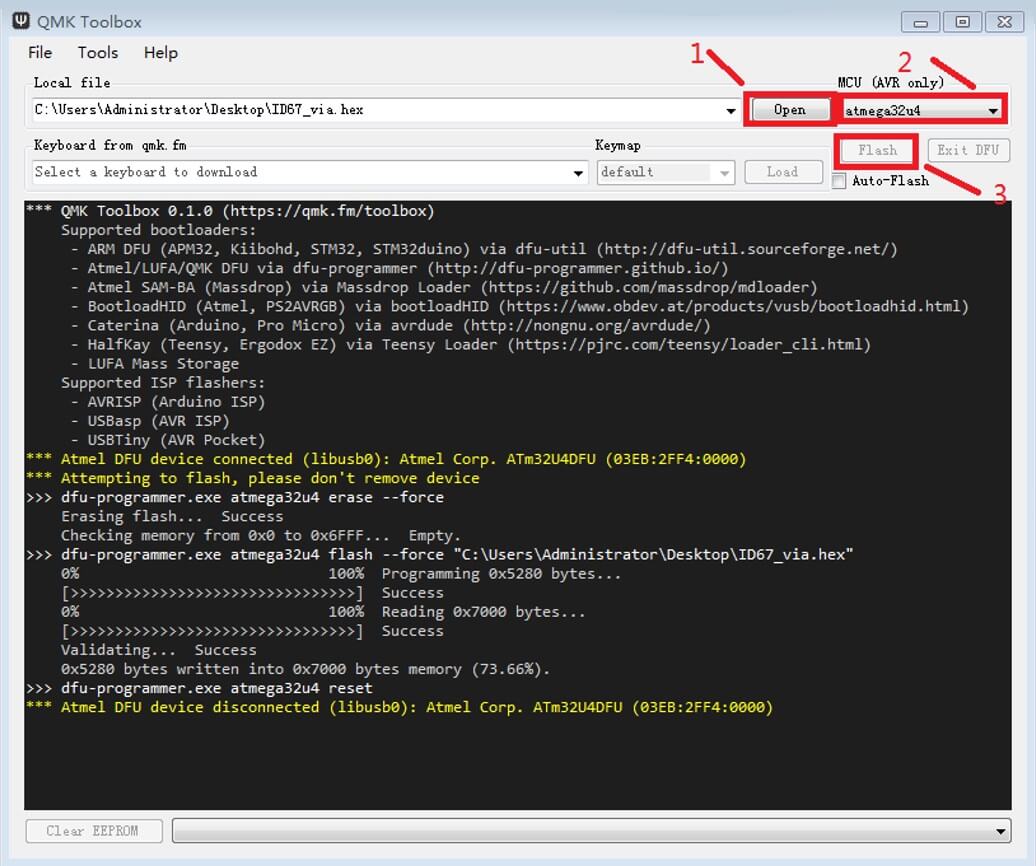
Open qmk_toolbox
-
On “Open” box, select:
ID67_via.hex -
On “MCU (AVR only)”, select
atmega32u4 -
Press the reset botton S1 on the PCBA (or press Fn+Z on the keyboard)
It’ll display “
***atmel DFU device connected................ .” -
Press “Flash”
It shows “
Success”, “Atmel DFU device disconnected...... .”Means the keyboard is ready to use
-
-
Open software VIA, you are on windows of “KEYMAP”, “BASIC”
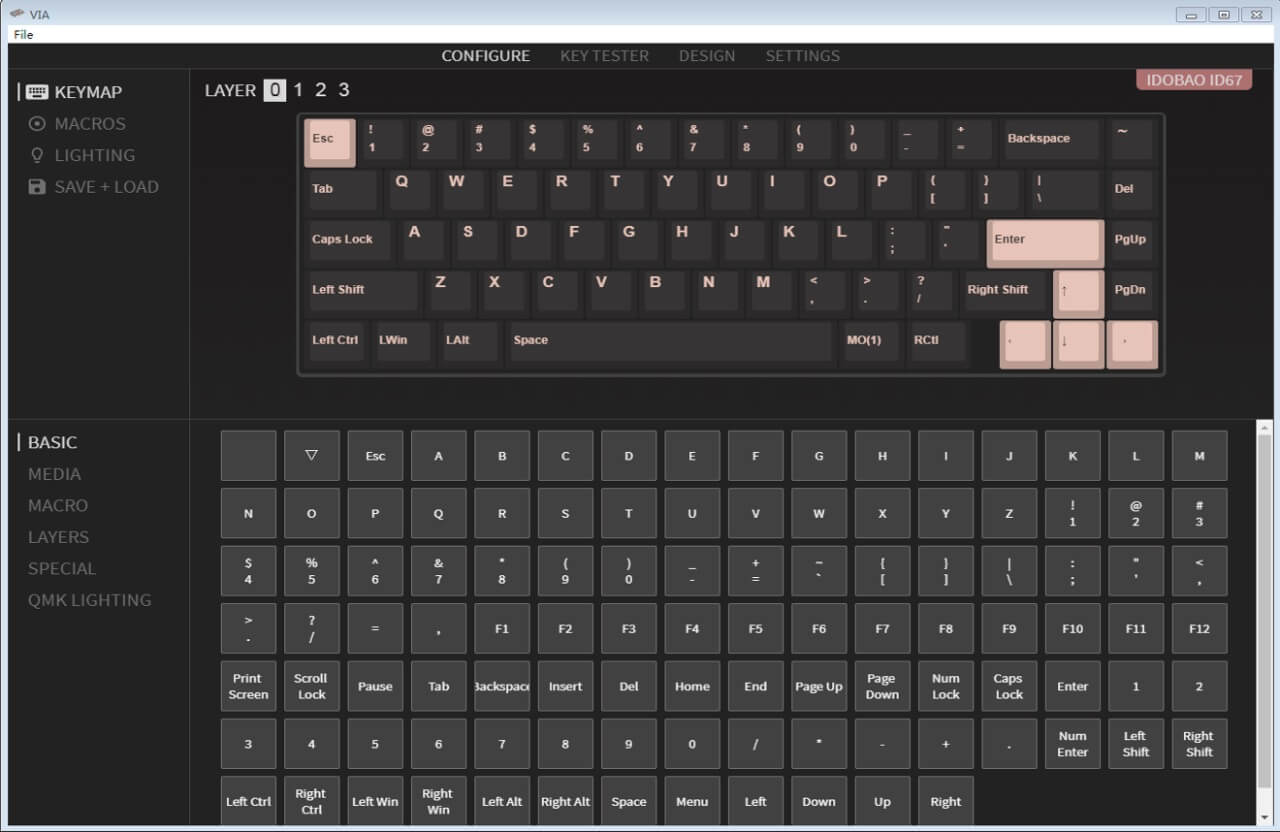
Now (if) you want to edit D (on KEYMAP-CONFIGURE-LAYER0) to 5
-
Select the layer you want to edit (e.g., LAYER 0)
-
Select the key you want to edit (e.g., D, it will twinkle)
-
Select 5 on window “BASIC”, then the “D” will be changed to “5” on “KEYMAP”
-
Repeat step 1) to 3) to edit other keys
-
Thus the keyboard is edited successfully.
You can use KEYTESTER to check it, if incorrect, repeat above step to complete it.
-